Tag: #.net

Xamarin Forms – Data retrieval with a network service call

I am currently working through refactoring my native Android application; with that I realized I had never posted about networking using Xamarin using an ObservableCollection. I wanted to see how an actual active network call worked vs. my prior example working with Xamarin ObservableCollection lists using data created by the user in Xamarin Forms – Group ListView using an ObservableCollection. I updated first solution in there to use Forms 5 and to use the current android API.

In the network call, I wanted it to use a REST endpoint, as most endpoints have converted over to it and I wanted to use a endpoint that didn’t require a API key to keep it simpler for everyone. This turned out to be more difficult than I thought it would be. I found two: pokeapi.co, which is all about all Pokemon and openbrewerydb.org that dealt with public information on breweries, cideries, and brewpubs. I ended up using openbrewerydb.org, as that didn’t require multiple calls to piece enough information together to display.

Note: With iOS, you’ll have to either have an Apple developer account or use this method to sign the iOS application, so the app network call will work – otherwise it will not work and throw an error.

Service mapping

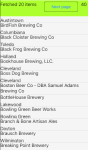
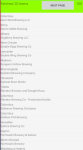
I used Postman to explore the JSON results of this call: https://api.openbrewerydb.org/breweries?by_state=ohio&page=5. I ended up choosing Ohio as it had more than 4 pages worth of data. I used https://json2csharp.com and pasted the results into it and it generated out a class:

    public class Root
    {
        public string id { get; set; }
        public string name { get; set; }
        public string brewery_type { get; set; }
        public string street { get; set; }
        public object address_2 { get; set; }
        public object address_3 { get; set; }
        public string city { get; set; }
        public string state { get; set; }
        public object county_province { get; set; }
        public string postal_code { get; set; }
        public string country { get; set; }
        public string longitude { get; set; }
        public string latitude { get; set; }
        public string phone { get; set; }
        public string website_url { get; set; }
        public DateTime updated_at { get; set; }
        public DateTime created_at { get; set; }
    }

The website didn’t quite decode the JSON properly, as it should have made a list instead of a single element; also the object items should have been strings instead – but most of the data for these were null, so that’s OK. To be fair, it created the class w/o any input from me and I was able to fix it easily enough. I ended up calling this class Brewery and put it into the model directory.

Service Call

Next was time to do the service. I’ve seen this example, but ended up using this blog entry as my primary network example. I used the above open brewery link as my URI base and formatted the data parameters into the URI. Once that is done, access the network and then process the result, if it worked OK. If this were a production app, I’d do a few retries, in case the result wasn’t successful.

        public const string BASE_BREWERY_LIST_URL = "https://api.openbrewerydb.org/breweries?by_state={0}&page={1}";

        public static async Task<IList<Brewery>> GetBreweriesAsync(string state, int page)
        {
            IList<Brewery> breweries = new List<Brewery>();

            string url = String.Format(BASE_BREWERY_LIST_URL, state, page);
            using (HttpClient httpClient = new HttpClient())
            {
                System.Diagnostics.Debug.WriteLine("Get data - starting network call");
                var response = await httpClient.GetAsync(url);
                System.Diagnostics.Debug.WriteLine("Get data - network call complete");

                if (response.IsSuccessStatusCode)
                {
                    var content = await response.Content.ReadAsStringAsync();
                    var posts = JsonConvert.DeserializeObject<IList<Brewery>>(content);
                    breweries = posts;
                }
                else
                {
                    httpClient.CancelPendingRequests();
                }
            }

            return breweries;
        }

XAML

Next was to deal with the XAML. As I noted above, I updated my Github fork of the Xamarin forms sample project that used ObservableCollection. In this project in the XAML, there were warning messages complaining about items were not bound. Since they worked fine, it was bound correctly, it was just done via code behind binding here:

BindingContext = new ViewModelSection(Navigation);

I ended up commenting this binding out and moving the binding into to the XAML by adding the viewModel label:

<ContentPage xmlns="http://xamarin.com/schemas/2014/forms" xmlns:x="http://schemas.microsoft.com/winfx/2009/xaml" 
             x:Class="LabelledSections.LabelledSectionXaml"
             xmlns:viewModel="clr-namespace:LabelledSectionsList;assembly=LabelledSectionsList">

and adding this chunk (as this is a ContentPage), which :

    <ContentPage.BindingContext>
        <viewModel:ViewModelSection />
    </ContentPage.BindingContext>

This required a slight change to the view model to add a constructor that didn’t have any parameters.

Strangely, this took me adding and removing the text ViewModelSection probably 3-4 times as well as cleaning / rebuilding each time and closing / reopening VS Mac a few times before the XAML stopped showing the view model name (ViewModelSection) as not an error. This is one reason to leave the code behind binding 🤨

Jumping back to the network project I wanted to have a top block that dealt with getting the data and below it a list of the data that was brought back. I specifically wanted a count of the number of rows currently in the ObservableCollection brewery list. I originally had this as a separate count in the view model, but changed it to use the actual count of the brewery list for accuracy. I again performed the XAML binding, similar to the other project noted above. As I was not doing an update, I wanted to be sure to set the binding as one way on the list. The caching strategy was from the default construction of the ContentPage, so after looking at the docs, it seemed to be the best of the given strategies w/o moving to another renderer.

            <ListView x:Name="MyListView" 
                    ItemsSource="{Binding LocationList, Mode=OneWay}"
                    CachingStrategy="RecycleElement">

Interestingly enough, the use of Forms 5 allowed me to use XAML hot reload – I had not used it much before. Also interesting is that while running it via VS, both under iOS and Android, it ran pretty janky; but run just on it’s own, it ran fine. I thought that this might be an issue with the thread locking ObservableCollection when adding items to the list, but even after creating a subclass of the collection, it was still janky. I ended up removing the NotifyPropertyChange as ObservableCollection has this built in; but the jank continued. Given this I wonder if there’s a problem with XAML hot reload to cause this – just not sure. Given the advice to use ObservableCollection instead of a normal list, I went ahead and stuck with that, but in this particular case, it might be smarter to move to a list for a possible performance increase as it’s not a two way binding and we aren’t checking for network updates to items in our list.

UI – iOS / Android

I’m glad to have finally done this for comparison. To be sure, it’s much easier than dealing with native Android network calls, but less customizable.

If you want to check out this Xamarin network project, head over to the Github repo.

Using Xamarin Android with MediaStore – Part 2

Starting in Android 10 (API 29) apps would no longer write outside the app’s own directory. The new method of accessing external storage files is via scoped storage. Scoped storage is essentially two different API’s to access files: Storage Access Framework (SAF) for reading and writing, and MediaStore provider for writing to certain directories. I was more interested in the MediaStore provider, as I didn’t want to bother with asking the user to select where to place the file; I just wanted the app to write the file the same place it always did, which was in the Android download directory (external storage).

There are some articles about both API’s in native Android, but none using Xamarin. I recommend going back to the MediaStore part 1 article, to show how to create an file via insert. In this MediaStore part 2 post, we’ll go over the other 3 portions: query, delete, and update. I’d like to point out Commonsware’s MediaStore article, which really helped out dealing with MediaStore under Xamarin. I’d also like to point out looking at the Android Storage MediaStore example as well. This article will go over the mechanics of these 3 and finally in the part 3 article, we will put this to the test.

Part 2’s example app is available for download on Github will check if the app is running on API 28 (Android 9) or on API 29 and above and do different things. With the much easier use case with the WRITE_EXTERNAL_STORAGE permission stopping at API 28 to do it the easy and now deprecated way and on API 29 and above using scoped storage.

Query

A query allows the checking for file(s) in the MediaStore collection (from the Android doco):

    * Images, including photographs and screenshots, which are stored in the DCIM/ and Pictures/ directories. The system adds these files to the MediaStore.Images table.
    * Videos, which are stored in the DCIM/, Movies/, and Pictures/ directories. The system adds these files to the MediaStore.Video table.
    * Audio files, which are stored in the Alarms/, Audiobooks/, Music/, Notifications/, Podcasts/, and Ringtones/ directories. Additionally, the system recognizes audio playlists that are in the Music/ or Movies/ directories, as well as voice recordings that are in the Recordings/ directory. The system adds these files to the MediaStore.Audio table. The recordings directory isn't available on Android 11 (API level 30) and lower.
    * Downloaded files, which are stored in the Download/ directory. On devices that run Android 10 (API level 29) and higher, these files are stored in the MediaStore.Downloads table. This table isn't available on Android 9 (API level 28) and lower.

It’s similar processing using Android DownloadManager. As noted in Commonsware article, if your app wants to access a file it didn’t create, the SAF must be used.

If you are TLDR and want to see the project code, jump here.

First, need to choose which columns to return:

            var projection = new List<string>()
            {
                Android.Provider.MediaStore.Downloads.InterfaceConsts.Id,
                Android.Provider.MediaStore.Downloads.InterfaceConsts.DisplayName,
                Android.Provider.MediaStore.Downloads.InterfaceConsts.DateAdded,
                Android.Provider.MediaStore.Downloads.InterfaceConsts.Title,
                Android.Provider.MediaStore.Downloads.InterfaceConsts.RelativePath,
                Android.Provider.MediaStore.Downloads.InterfaceConsts.MimeType,
            }.ToArray();

Create the where select statement and the selection arguments:

            string selection = Android.Provider.MediaStore.Downloads.InterfaceConsts.MimeType + " = ?";

            var selectionArgs = new List<string>()
            {
                "text/plain"
            };

Create the ContentResolver and issue the query. It should return the data for your selection, if any exists. Note: this example is checking the Downloads MediaStore data.

                ContentResolver contentResolver = CrossCurrentActivity.Current.AppContext.ContentResolver;
                ICursor cursor = contentResolver.Query(Android.Provider.MediaStore.Downloads.ExternalContentUri, projection, selection, selectionArgs.ToArray(), null);

Finally, if there is data, choose the columns and get the results. Specifically, it will check the result against a passed in filename to see if it matches; if so, build the Android URI from the file Id and break out of the loop.

                if (cursor != null && cursor.Count > 0)
                {
                    int idColumn = cursor.GetColumnIndexOrThrow(Android.Provider.MediaStore.Downloads.InterfaceConsts.Id);
                    int dispNameColumn = cursor.GetColumnIndexOrThrow(Android.Provider.MediaStore.Downloads.InterfaceConsts.DisplayName);

                    cursor.MoveToFirst();

                    do
                    {
                        long id = cursor.GetLong(idColumn);
                        string displayName = cursor.GetString(dispNameColumn);

                        if (displayName.Equals(filename))
                        {
                            Android.Net.Uri uri1 = Android.Provider.MediaStore.Downloads.ExternalContentUri.BuildUpon().AppendPath(id.ToString()).Build();
                            androidUri = uri1.ToString();
                            androidFileId = id;
                            break;
                        }
                    }
                    while (cursor.MoveToNext());

                    cursor.Close();
                    cursor.Dispose();
                }

Delete

Delete will attempt to delete the entry from the MediaStore database; as part of this it will not only remove the entry, it will also remove the file external filesystem Download directory. Part 3 will go over when one app delete a file and another tries to read it.

Deleting is much like querying, excepting the criteria needs to be exact and the delete may fail. In this example, id being used, whereas the URI could also be used instead.

As in the query, setup the selection and selection criteria.

            var selection = Android.Provider.MediaStore.Downloads.InterfaceConsts.Id + " = ?";
 
            var selectionArgs = new List<string>()
            {
                androidFileId.ToString()
            };

Create the ContentResolver and issue the delete. It should return the count of files deleted, if any. It’s in a try/catch block, as this may fail. Note: this example is checking the Downloads MediaStore data.

            try
            {
                ContentResolver contentResolver = CrossCurrentActivity.Current.AppContext.ContentResolver;
                int count = contentResolver.Delete(Android.Provider.MediaStore.Downloads.ExternalContentUri, selection, selectionArgs.ToArray());
            }
            catch (Exception ex)
            ....

Update

The update method isn’t what I thought it should be given the action, so further explanation may be helpful..

An update does not allow the app to get a file stream to re-write the contents of a file. It is a API 30 and above feature, unavailable in API 29. When a file is created with the MediaStore insert, as part of the values sent can be a is_pending flag set to 1, which indicates that the file is being populated and should not be accessed until the file write activity is completed. This update method allows changing the is_pending flag on the MediaStore to 0, so that the file may be accessed after the write is completed.

Generally speaking, the is_pending flag should not be used / set unless you are downloading data; it’s a waste of time otherwise. The DownloadTwo example allows setting of the flag on API 30 and above to show the use of the flag, for an example of usage. Note that when the app creates the file and is passed back the Android URI, the app will need to keep track of it, so that it can then pass in that same Android URI to update the flag in the MediaStore database.

DownloadTwo API 29
DownloadTwo API 31

On the insert, the flag must be set as part of the bundle that is passed into the ContentResolver:

           ContentValues values = new ContentValues();
...
           values.Put(Android.Provider.MediaStore.IMediaColumns.IsPending, 1);
...
           Android.Net.Uri newUri = contentResolver.Insert(Android.Provider.MediaStore.Downloads.ExternalContentUri, values);

After writing the data to the file stream, if you examine the file that was created, it has a .pending-(value)- prefixed on top of the passed in filename; as shown here:

emulator64_x86_64_arm64:/sdcard/Download # ls -ltra
total 8
-rwxrwx--- 1 u0_a145 media_rw 8 2021-10-19 23:49 .pending-1632268191-testing_file.txt

This is interesting, as the Android File app shows the “regular” name and not this name.


Note: the shown file app filename does not match internal actual Unix name. This disallows usage of the file via other apps until the the file write is complete.

Next, perform the update:

            ContentValues values = new ContentValues();
            values.Put(Android.Provider.MediaStore.IMediaColumns.IsPending, 0);

            try
            {
                ContentResolver contentResolver = CrossCurrentActivity.Current.AppContext.ContentResolver;

                Android.Net.Uri updateUri = Android.Net.Uri.Parse(androidUri);
                int count = contentResolver.Update(updateUri, values, null, null);
            }
            catch (Exception ex)

After the update button is pushed, on device this is the Downloads directory:

emulator64_x86_64_arm64:/sdcard/Download # ls -ltra
total 8
-rwxrwx--- 1 u0_a145 media_rw 14 2021-10-20 22:09 testing_file.txt

Android file manager looks as it did above; however, the file contents are now accessible via an app, such as Chrome.

Note: app must keep track of the Android URI of returned on the MediaStore insert to perform the update.

Hopefully this article, along with part 1, will give you enough information on how to deal with Android storage with MediaStore. In part 3, we will test how MediaStore works with two different apps accessing the same file.